Section 2 - Basics
Section 4 - Advanced
Fancy Lists
Forms
Advanced Tables
Frames
Style Sheets
Background
Text, Dimension
Border
Padding, list
Classification
Positioning
Misc.
Multiple CSS
You try it
Image Maps
Section 5 - Publishing
Section 6 - Extras
Appendices
Showing and hiding paragraphs
It's very easy to hide everything on a page. You can specify code to hide a section as follows: In the head you'd put:
- <style type="text/css">
div.hide {display: none}
</STYLE>
- <div class="hide">
I bet you can't find this line anywhere else in the text.
</div>
I bet you can't find this line anywhere else in the text.
Notice that nothing's there? I'm not sure you'll need this, but if you can find a good way to use it, let me know.
No spacing between paragraphs
I have no idea why on earth you want to do this either, but you can make paragraphs run together like single lines. (It would be much easier to just type it as one line.) Here's how it's done:
In the head you put:
- <style type="text/css">
p.runon {display: inline}
</STYLE>
- <p class="runon">
Here is the first paragraph. Notice
</p> - <p class="runon">
that these two paragraphs run together.
</p>
Here is the first paragraph. Notice
that these two paragraphs run together.
Picture captions
Finally, something useful. One difficult thing to do with web pages is to create a caption for a picture. It can be done with tables, but even that is sometimes difficult. Now, with CSS, it's possible. Here's how to do it:
In the head:
- <style type="text/css">
div.pic {float:right; width:120px; margin:0 0 15px 20px; padding:15px; border:1px solid black; text-align:center;}
</STYLE>
In the body:
- <div class="pic">
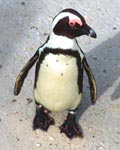
<img src="peng.jpg">
Captions, at last!
</div> - <p>
This is the text. It is only here so you can see that the picture with the caption are hanging out to the right of the text.
</p>
 Captions, at last!
This is the text. It is only here so you can see that the picture with the caption are hanging out to the right of the text.
Placing an item
You can change the position of an item to the right or left of where it would normally be. You must specify the number of pixels you want it shifted, but the code is reltively simple. Not only can this be done for pictures, but text as well.
In the head:
- <style type="text/css">
h1.left{position:relative;left:20px}
h1.right{position:relative;left:-20px}
</STYLE>
- <h1>
Normal heading
</h1> - <h1 class="left">
Heading shifted left
</h1> - <h1 class="right">
Heading shifted right
</h1>
Normal Heading
Heading shifted left
Heading shifted right
Cursors
For your supreme patience in getting through this page, you get to learn how to mess with your cursors!!! This is horribly fun to do to people.
So, here's how you use these. Suppose you want to make an entire paragraph have the pointy cursor, so it looks like a link. You need no tag in the head, and only have to add one thing to the paragraph tag. Here's how you would do that:
- <p style="cursor:pointer">
Your crazy, paragraph text goes here.
</p>
Your crazy, paragraph text goes here.
Mouse over the font and you'll notice that it shows the pointer, like a ling. It's not, but it's fun to change the pointer sometimes. You can change it on a link too. Here's an example:- <a href="google.com" style="cursor:help">
This is the link text
</a>
Mousing over that should produce a question mark over the link. Fun stuff. Try not to be too annoying with that.
Below are the different types of cursors you can specify. Mouse over them to see what the cursors look like.
style="cursor:auto"
style="cursor:crosshair"
style="cursor:default"
style="cursor:pointer"
style="cursor:move"
style="cursor:e-resize"
style="cursor:ne-resize"
style="cursor:nw-resize"
style="cursor:n-resize"
style="cursor:se-resize"
style="cursor:sw-resize"
style="cursor:s-resize"
style="cursor:w-resize"
style="cursor:text"
style="cursor:wait"
style="cursor:help"

|

|

|